Genshin Impact Version 3.8 update has brought a new set of enemies for both Floor 11 and Floor 12 in the Spiral Abyss. Since these are the topmost floors of the Abyss, ensure that you have units that are at least sufficiently built for the teams they are in. There are tons of team variations you can use.
But if you want to try the teams suggested in this guide, you should use your units that might be better alternatives and substitutes. In this guide, we will explain the new changes in the current Spiral Abyss, how to clear them in the current Genshin Impact 3.8 patch update, and the most optimal teams that can be used.
Genshin Impact 3.8 Update Spiral Abyss Guide: How to clear Floor 11
Ley Line Disorder: All party members receive a 75% Physical DMG Bonus
Chamber 1
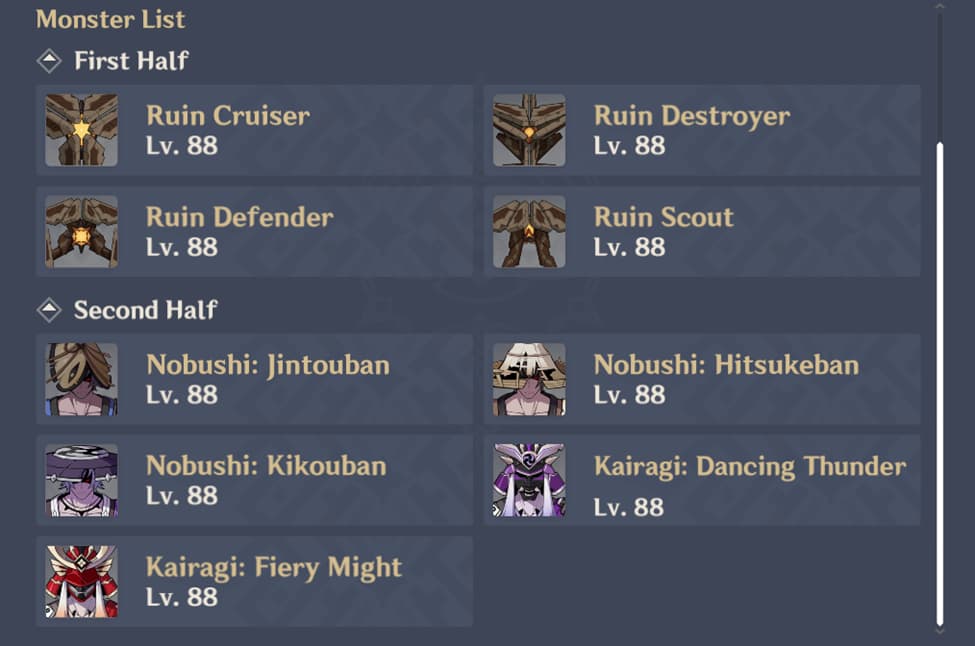
First Half
- In this scenario, the first wave of enemies spawned far from the Monolith, but instead of targeting it, all three Ruin enemies (Ruin Destroyer and Ruin Defender) are chasing after you. This presents an advantageous situation since you can stay away from the Monolith and focus on dealing with the enemies. You can either aim for Weak Spots or paralyze them first. The absence of timers in this stage gives you the freedom to decide which approach suits your playstyle and abilities best.
- During the second wave, prioritize protecting the Monolith from the Cruisers’ ‘Stinger Bombardment’ by dealing with one Cruiser at a time while also fending off the Ruin Scouts who are pursuing you. Utilize paralyzing tactics or bring an Anemo character with crowd-control abilities to gain an advantage against the Cruisers and manage the situation effectively.
- If you don’t have any crowd-control abilities (CC) and wish to gather the Ruin enemies for more efficient attacks, here’s a helpful technique. As soon as the second wave spawns, position yourself closely behind one of the Ruin Cruisers and initiate an attack to draw its attention (trigger aggro).
Second Half
- During the first three waves featuring the Nobushis, the enemies’ primary focus is on the Monolith. However, the advantage in this situation is that the Nobushis spawn very close to each other. While having an Anemo character with crowd-control abilities (CC) can be immensely helpful to gather them and trigger aggro simultaneously, it’s not necessary due to their close proximity.
- Once you manage to draw the Nobushis’ attention (trigger aggro), they will shift their focus from the Monolith to you. At this point, they completely ignore the Monolith, giving you the freedom to deal with them at your own pace. Since there is no time limit at this stage, you can take your time strategizing and defeating the Nobushis with careful planning.
- In the final wave featuring two Kairagi, using Anemo CC to gather them may not be effective due to their heaviness. Instead, the best approach is to aggro both Kairagi by repeatedly hitting them, and then lure them away from the Monolith. During this wave, one of the Kairagi’s abilities allows them to regenerate half of their HP and become immune to crowd-control (CC) effects once the other Kairagi is defeated.
Chamber 2
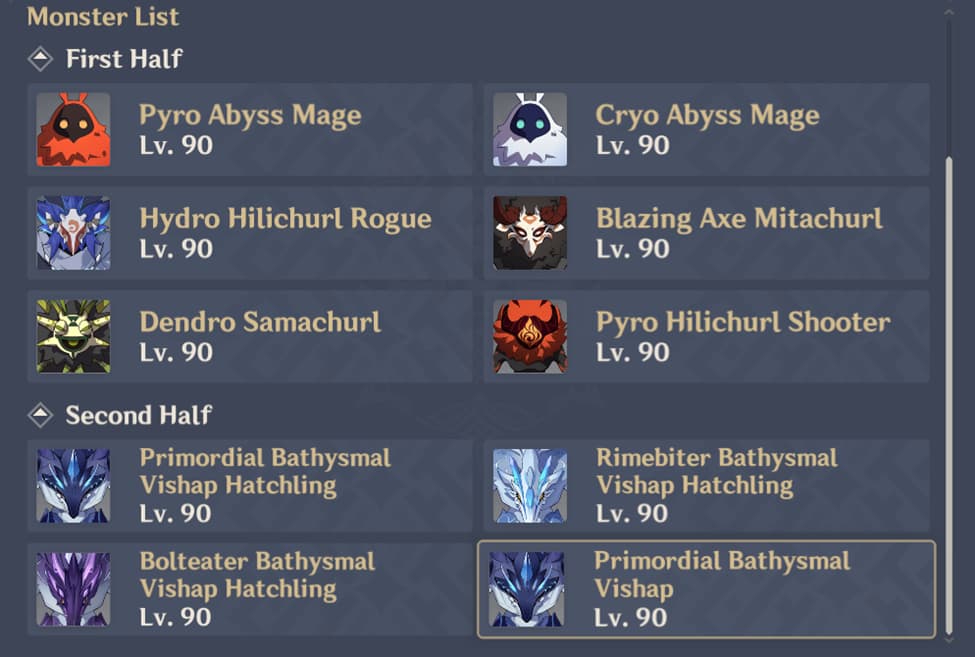
First Half
- All enemies spawn far from each other and most of them don’t chase after you; they stay still and have ranged attacks. Start by turning back and focusing on the Dendro Samachurl first. This enemy is different because of its Dendro element, and once it’s defeated, you won’t have to worry about elemental reactions from the enemies anymore.
- All enemies still spawn far from each other, but this time, they will all chase after you, making it easier to gather them. Prioritize dealing with the Hydro Hilichurl Rouge first. While it walks slowly, it has a long-range attack with its Hydro Slime. By taking it down first, you can manage the distance and avoid its ranged attacks while dealing with the other enemies.
- The Abyss Mages spawn near each other, allowing for the possibility of using Anemo CC (Crowd Control) to quickly break their elemental shields with Swirl, as there are two elements present (Pyro + Cryo) that can cancel each other out.
Second Half
- In the first wave, all the enemies, including the Vishap Hatchlings, spawn near each other. However, these hatchlings can be staggered easily, causing them to be knocked back slightly and separated from each other. If you don’t have any Anemo crowd-control (CC) abilities to gather them, you can use a different strategy.
- In the second wave, the two Vishap also spawn near each other. Utilizing the same wall strategy as before, you back yourself up against the wall and let the Vishaps come after you. Once they are near, you can unleash all sorts of Skills and Bursts without worrying about them being separated too much.
Chamber 3
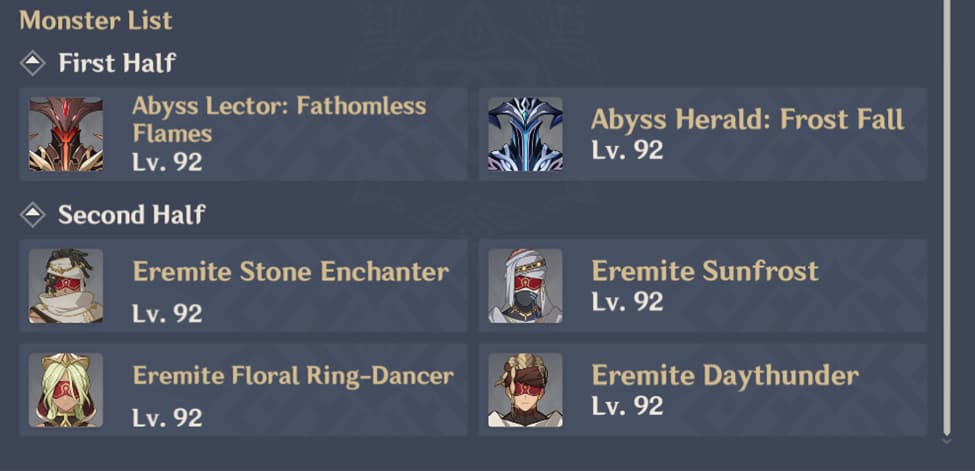
First Half
- The two Abyss foes spawn opposite one another during the only wave that occurs here. One of them will pursue you, so that won’t be a problem. Because Frost Fall will pursue you much more quickly than the Flame One when the challenge begins, move toward the Fathomless Flame at the front.
- Once you are within striking distance of both of them, you must reduce their HP to a crucial health level (20%) before they can activate their corresponding elemental shields (Pyro for Fathomless Flame and Cryo for Frost Fall). Hydro is superior to Pyro shield in this situation, and Pyro shield is superior to Cryo shield
- One talent used by the Fathomless Flame in its second phase summons a meteor and leaves Darkfire Furnace on the field. As soon as this object arrives on the field, you should run after it and use elemental attacks to kill it (hydro is the best). This is because throughout the entire time, Darkfire Furnace is on the field, the Lector will cause several flames to erupt up from the earth. Additionally, the Lector’s shield will become less effective until this furnace is gone.
Second Half
- All of the enemies spawn together in the initial wave. The Stone Enchanter will immediately reach a strengthened state and conjure his spirit crocodile. The best course of action is to kill the spirit animal first if your DPS can’t get past his now-increased RES.
- All Eremites still spawn close to one another in the second wave, although they do so in the arena’s rear. Now that they can generate elemental reactions, this trio is quite a force to be reckoned with. The Floral Ring-Dancer will reach her heightened condition and call her spirit animal serpent like the Stone Enchanter.
- The same approach as previously, concentrate on the spirit animal first to knock the summoner unconscious and kill him, then, if any of the surviving Daythunders are still alive despite all the collateral damage, turn your attention to them.
Optimal Team Comps to use on Floor 11
For Chamber 1, there are Leyline Monolith stages, therefore you should fit in an Anemo CC to any of the teams. Remember that the explosion from the Dendro Cores will also cause some damage and lower the Monolith’s HP if you intend to bring a Bloom squad. In the First Half of the challenge, it is advisable to bring characters with Pyro, Cryo, or Dendro elements.
This is because there are Pyro and Cryo Abyss Lectors and Mages present, and using the recommended elements will make it easier to break their respective elemental shields. Having characters with Pyro, Cryo, or Dendro elements enables you to deal significant damage to the enemies’ shields, allowing for faster elimination.
F2P Friendly
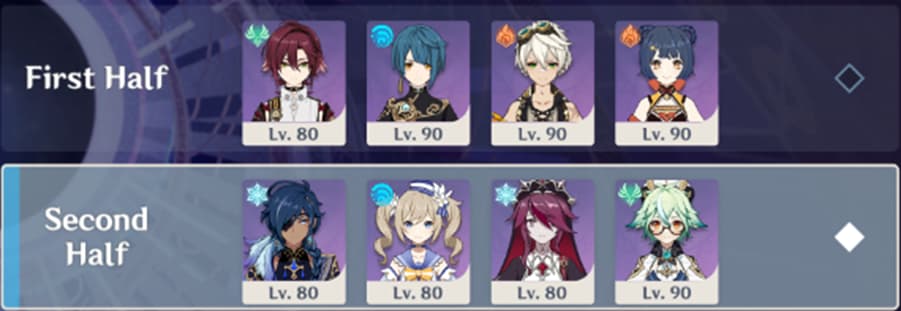
- First Half: Heizou, Xingqiu, Bennett, Xiangling
- Second Half: Kaeya, Barbara, Rosaria, Sucrose
Expert Game-through
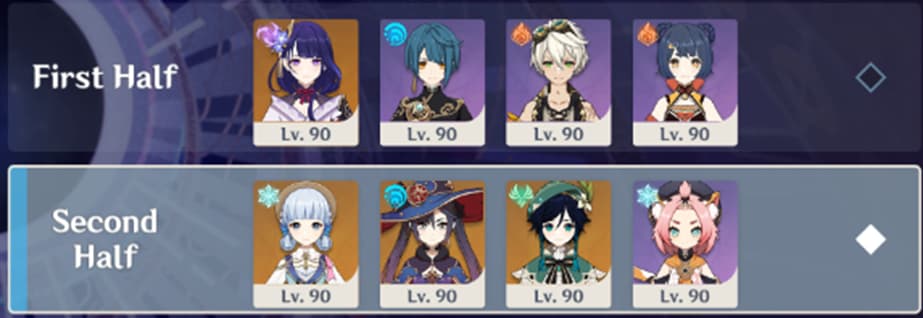
- First Half: Raiden Shogun, Xingqiu, Bennett, Xiangling
- Second Half: Ayaka, Mona, Venti, Diona
Genshin Impact 3.8 Update Spiral Abyss Guide: How to clear Floor 12
Ley Line Disorder: For this floor only, the Ley Line flow will be normal.
Chamber 1
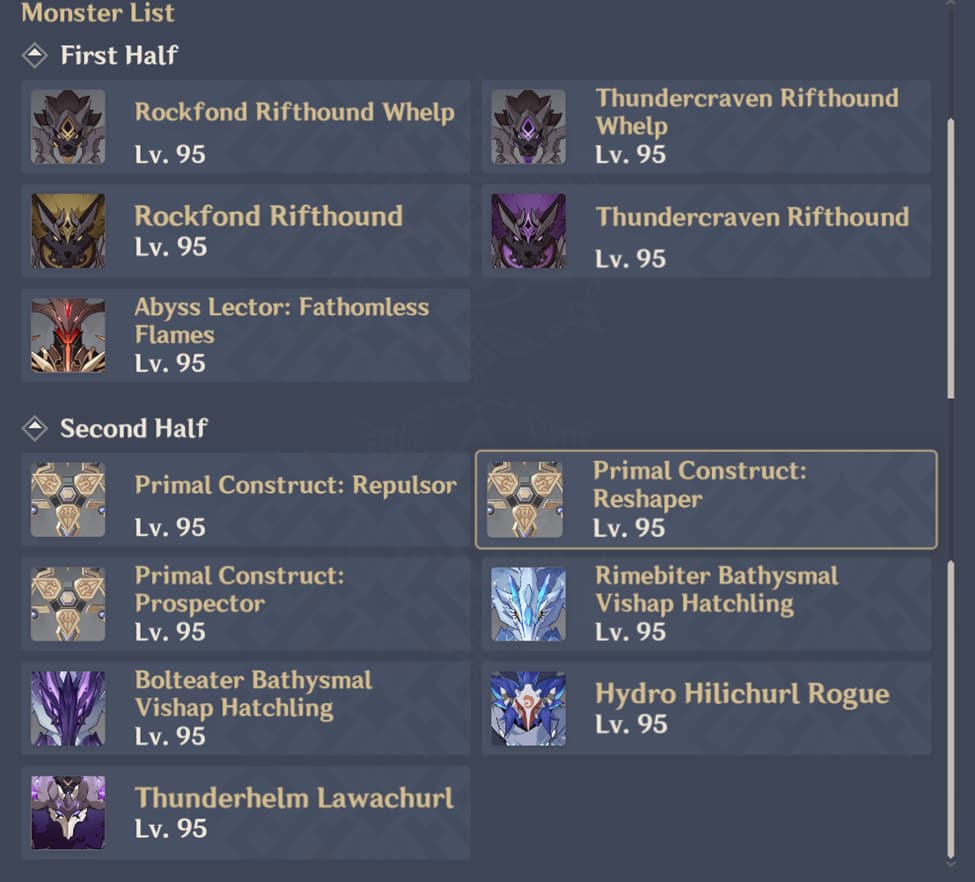
First Half
- In the first wave of the challenge, all Whelps spawn near each other at the center of the arena. It is highly recommended to bring characters with Anemo crowd-control (CC) abilities since the Whelps tend to teleport. By utilizing Anemo CC, you can prevent them from teleporting around too much and control their movements effectively.
- When engaging the Whelps, it’s essential to use their respective elemental damage weaknesses against them. For example, using Geo attacks against Rockfond Whelps and Electro attacks against Thundercraven Whelps will trigger their Elemental Devourer state.
- In the second wave, all enemies spawn near each other in the front area, as you mentioned earlier. The strategy for dealing with the Rifthounds remains similar to that of the Whelps, with their main difference being their higher HP pool and unique attacks. As you engage the Rifthounds, make use of their elemental weaknesses.
Second Half
- In the first wave, the triangle enemies spawn near each other, making it unnecessary to rely on Anemo crowd-control (CC) abilities, especially since the subsequent floors feature bosses. Destroy the Parts and Use Electro, Inflict Quicken, Wait for Invisible State to End.
- In the second wave, the two Hatchlings spawn near each other at the back of the arena. As mentioned earlier, if you don’t bring Anemo crowd-control (CC), you can use the strategy of walking to the nearest wall and cornering yourself there. This tactic limits the space available for the Hatchlings to move around, preventing them from straying too far apart and making it easier to manage them as a group.
- In the third wave, the three enemies spawn far from each other. As a strategy, after they appear, you should immediately head towards any of the Hydro Hilichurl Rouges. By doing so, you can trigger the Lawachurl (and possibly the other Rouge) to chase after you.
Chamber 2
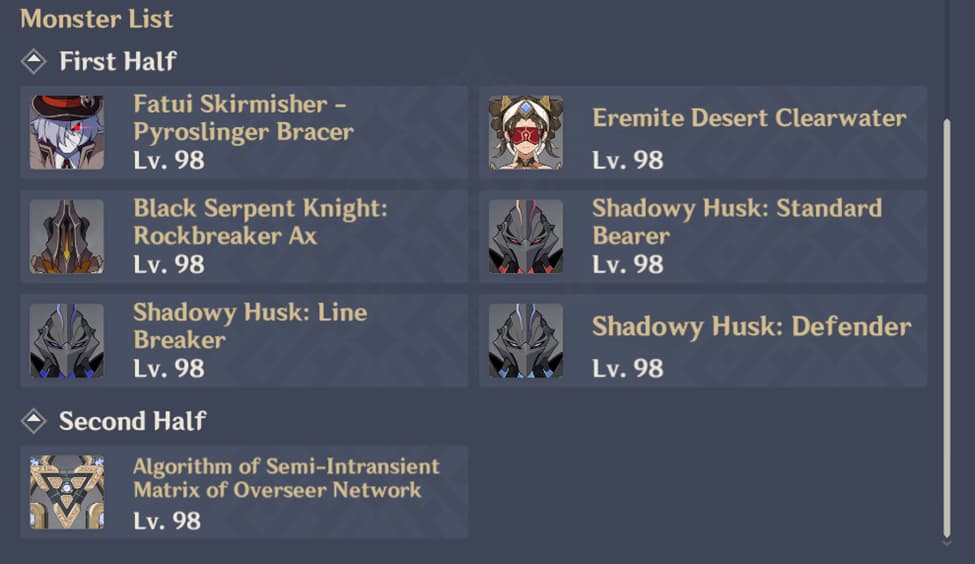
First Half
- In the first wave, all enemies spawn far from each other. If you don’t have Anemo crowd-control (CC) abilities, you can adopt a specific strategy to deal with the Pyroslingers effectively.
- As the challenge starts, approach any of the Pyroslingers and position yourself behind them. By standing behind the Pyroslinger, you can prompt them to turn around, causing their back to face the other Pyroslinger. This positioning prevents the Pyroslingers from jumping backward when you get too close to them.
- In the second wave, all enemies spawn near each other at the back of the arena. As a strategy, it’s best to rush to the back and prioritize focusing on the Line Breaker first, which is the blue enemy.
- The reason for targeting the Line Breaker initially is because it possesses a skill that charges ahead, causing it to move far away from the other enemies. By eliminating the Line Breaker early, you can prevent it from creating distance from the group and keep the enemies closer together for more efficient damage dealing.
Second Half
- ASIMON, like the smaller Primal Construct, often enters invisibility mode by firing components toward you, rendering it impossible to spot. However, there are two methods to paralyze it and cancel its invisibility:
- Use Catalyze Reaction on the Cores: The hidden main body of ASIMON has cores that can be targeted and attacked. By using a Catalyze reaction (triggering a combination of specific elemental reactions) on the cores, you can paralyze the boss and reveal its position. To execute this method, utilize a combination of elements that can trigger catalyzed reactions and attack the cores to paralyze ASIMON.
- Destroy Components and Use Electro Attacks: The components that ASIMON fires at you are vulnerable to destruction. By destroying these components and using Electro attacks on them, you can also paralyze the boss and end its invisibility. Pay attention to the components, target them with your attacks, and utilize Electro damage to reveal and immobilize ASIMON.
Chamber 3
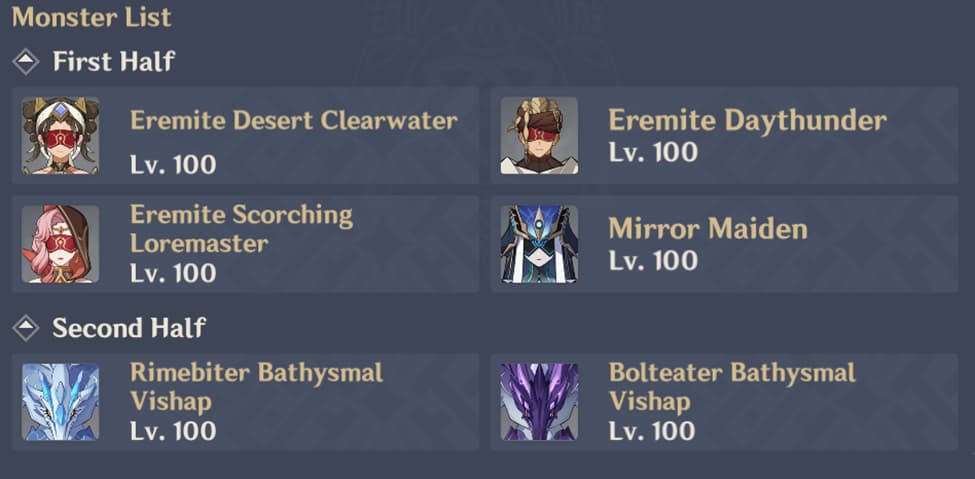
First Half
- In the first wave, both enemies spawn near each other and have their respective Aura effects. When facing the two enemies, it is essential to prioritize targeting Desert Clearwater due to her Slowing Water Aura, which can be the most troublesome to deal with.
- Both Eremites will aggressively chase after you during the battle, often positioning themselves close together, making them susceptible to area-of-effect (AoE) damage. This provides an excellent opportunity to deal significant damage to both enemies simultaneously.
- In the second wave, both enemies continue to spawn near each other, making it convenient to gather them together. However, dealing with the Mirror Maiden and Scorching Loremasters can be challenging due to their teleportation skills.
Second Half
- In this wave, you will face the Coral Defender boss, and it’s crucial to be aware of its attacks and special abilities to succeed in the challenge.
- Cleansing Shower Attack: The Coral Defender, like other Vishaps, has the Cleansing Shower attack that drains Energy from your active character.
- Double Beams Attack: When one of the Vishaps reaches critical health, both of them will join their tails at the center of the arena, forming a circular field. Avoid entering this field unless your character has high HP or a shield, as it deals simultaneous Cryo and Electro damage over time (DoT).
- Revival Ability: The most critical thing to remember is the Coral Defender’s special ability.
Optimal Team Comps to use on Floor 12
In the First Half, any elemental reactions are great for this floor, but one important element you need to bring is Hydro In addition, I recommend bringing at least one Anemo CC to the battle because there are lots of enemies in each chamber that can be gathered here to save your time. In the Second Half, the best element to bring here would be Electro just because you may need it when the Primal Constructs enter the invisibility state (As for the reactions, I suggest Catalyze or Hyperbloom). Anemo CC isn’t needed here because the only chamber that has many enemies is Chamber 1, but Chambers 2 and 3 are just bosses that can’t be gathered.
F2P Friendly
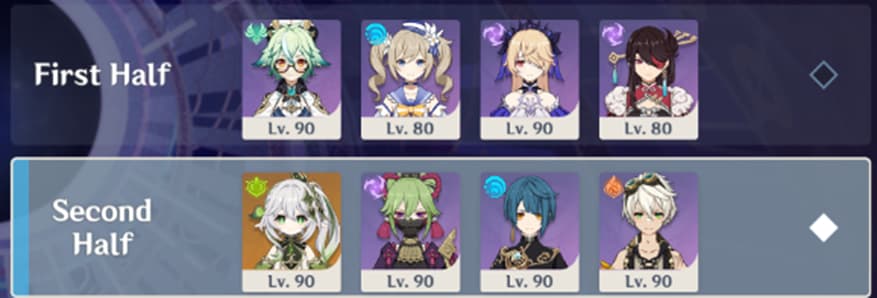
- First Half: Sucrose, Beidou, Barbara, Fischl
- Second Half: Nahida, Kuki Shinobu, Xingqiu, Bennett
Expert Game-through
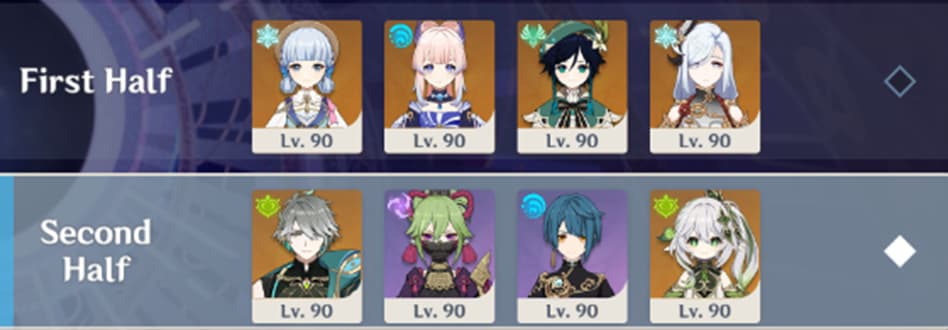
- First Half: Ayaka, Kokomi, Venti, Shenhe
- Second Half: Alhaitham, Kuki Shinobu, Nahida, Xingqiu
That’s it for the latest Spiral Abyss guide in the 3.8 Update!
What are your thoughts on the guide to clear the floors in the Spiral Abyss for the Genshin Impact 3.8 Update? Let us know in the comments below.
For more Mobile Gaming news and updates, join our WhatsApp group, Telegram Group, or Discord server. Also, follow us on Google News, Instagram, and Twitter for quick updates.
The post Genshin Impact 3.8 Update Spiral Abyss: Overview, How to clear 36 stars appeared first on GamingonPhone.
from GamingonPhone https://ift.tt/yXFTzn9


No comments:
Post a Comment