
Genshin Impact Version 4.1 update has brought a new set of enemies for both Floor 12 in the Spiral Abyss. Since these are the topmost floors of the Abyss, ensure that you have units that are at least sufficiently built for the teams they are in. In this guide, we will explain the new changes in the current Spiral Abyss, how to clear them in the current Genshin Impact 4.1 patch update, and the most optimal teams that can be used.
Genshin Impact 4.1 Update Spiral Abyss Guide: How to clear Floor 12
Ley Line Disorder: For this floor only, the Let Line flow will be normal.
Chamber 1
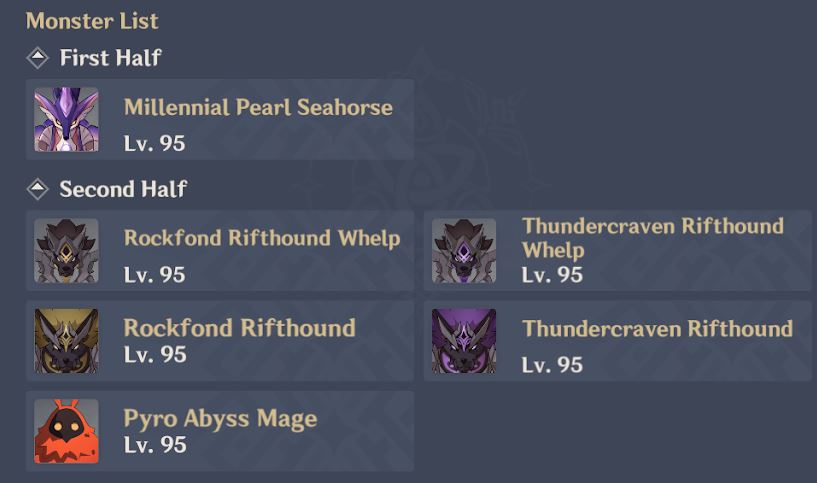
First Half
- There is only one wave here and it’s the new Millenial Pearl Seahorse. When you start the challenge, you can immediately attack it but it will have reduced damage. It still generates a few particles until you can see the Xenomare Pearl beneath its head. Be wary of when you can start attacking and don’t waste your Skill and Burst.
- Your main priority here is to destroy the Xenomare Pearl beneath its head (the best elements are Cryo/Pyro/Dendro) as it allows the enemy to use more powerful elemental attacks and possess stronger defensive abilities.
- Other than using Elemental Reactions to destroy the Xenomare Pearl, you can also destroy the Resonant Coral Orbs it creates while guiding Fontemer Hoarthunder to deal effective DMG to said Pearl.
- Remember that this boss also sometimes charges towards your direction and even hovers high in the air (You can still attack the Xenomare Pearl when it’s hovering in the air using the Bow character’s aimed shot). So you need to be careful when using your Ultimate in case the enemy might move from its original spot making you miss the Ult completely.
Second Half
- In the first wave, there will be a total of 6 Rockfond Rifthounds in the middle area. Although all of them will chase after you, it’s still recommended to bring an Anemo CC here to gather and stagger all of them while also preventing them from teleporting.
- Remember that these Rifthounds & Whelps’ attacks can apply stacks of Corrosion status, which will cause all your characters to continually lose HP. Shields can’t help protect your team from this debuff but a healer can. Heal to remove the Corrosion status.
- Once any of the Rifthounds are defeated, a new Rifthounds from the second wave will appear. But it’s still the same energy where you gather them in one place and deal with all sorts of reactions. If you don’t have any Anemo CC, then go to the wall at the front area of the arena to restrict their movements.
- In the third wave, there will be 3 Pyro Abyss Mages but they spawn far from each other. At the front, the 2 Mages at the back have a high chance to teleport to the front near your location.
Chamber 2
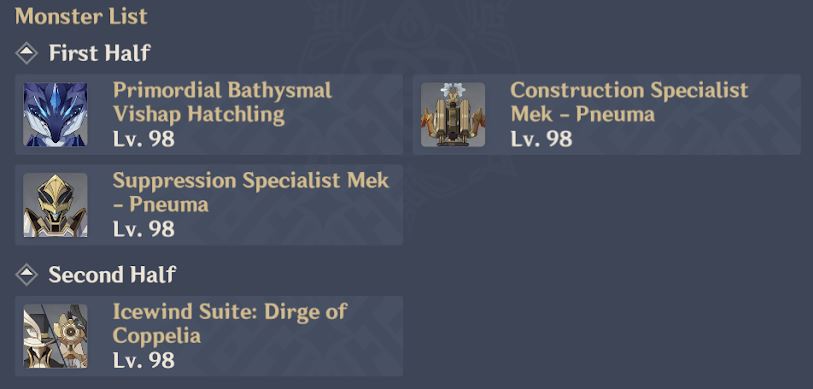
First Half
- If you didn’t bring Anemo CC, you can start by going to the nearest wall and trigger the swim attack from the Vishaps so they will chase after you. Remember that these Vishaps have 30% resistance against Physical and 20% against Hydro, so avoid bringing them if your characters are not fully built.
- In the second wave, there are 2 Meka spawn near each other in the front area. Between the 2 Mekas, focus on the Suppression Mek because it walks slowly unlike the Construction one.
- The combination of their attacks can trigger Burning (Dendro for Suppression + Pyro for Construction). Since both of them are Pneuma, they can be paralyzed if you can hit them with Ousia attacks 2 times (Lynette and Wriothesley are the only Ousia characters currently).
- But if you do bring them to the party, use the Arkhe attack on the Construction Meka because it moves too much and might stray away from you and the Suppression Meka’s location.
Second Half
- There is only one wave here and it’s the new boss ‘Icewind Suite’. The one you will be facing is Coppelia, the female counterpart that deals mostly with Cryo DMG. Coppelia is an Ousia-type and can be paralyzed by 3 Pneuma attacks like Freminet, Lyney, Neuvillette, and Hydro Traveler (but only during its Climax).
- All of its attacks are a combination of Anemo and Cryo DMG, and you should be able to avoid them like usual in the open world or tank them with a shield. The one you need to focus on is the Coppelia’s Climax which will be triggered at the beginning of the fight.
- Coppelia and Coppelius will move to the center of the arena and initiate Climax: Create 3 Whirlwinds of Dirge that will periodically unleash blasts, dealing Anemo DMG (+Cryo DMG if it’s infused with Coppelius’s ice blades). Those Frosthearts can’t be destroyed so ignore it and focus on the Coppelia.
- During the Climax, both of them will have 25% RES to all DMG. You can remove the climax move and paralyze the duo by hitting Coppelia when her core is exposed 3 times with Pneuma Attacks. Additionally, when hit by the Pneuma attack for the first/second time, the pulses of wind released by Coppelia will have a much smaller AoE and have their DMG reduced to 60% ATK.
Chamber 3
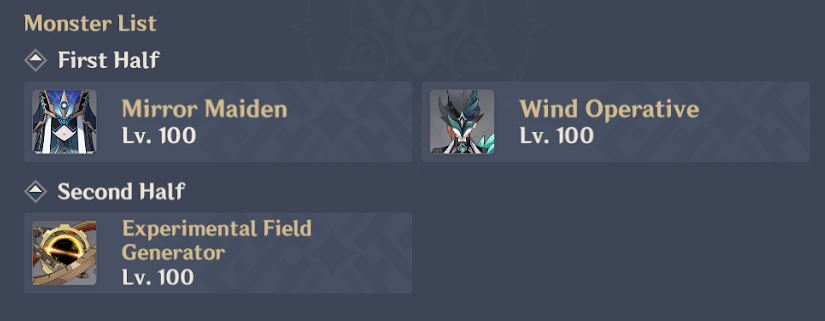
First Half
- The first wave only has one Mirror Maiden. The skill you need to be wary of is her teleportation skill. Make sure to time your Elemental Burst carefully so she doesn’t teleport right after you unleash the Burst, wasting all your Energy.
- In the second wave, there will be 2 Wind Operatives spawning far from each other in the back area. They can teleport to your location, but it may take time, so having an Anemo CC will be much better. If you don’t bring any Anemo CC, focus on one Wind Operative while facing the other Fatui in your line of sight.
- You need to keep watch of their attack and make sure you avoid their Hunt Down skill because it will attach a Bond of Life to the characters they hit.
- The problem is not only your characters will have a hard time healing, but the second time the same character gets hit with another Hunt Down skill, it will deal more DMG to said character. Since there are 2 Wind Operatives here, it’s important to watch both of them so they can’t stack the Bond of Life.
Second Half
- There is only one wave here and it’s the new boss ‘Experimental Field Generator’. This boss is an Ousia-type and can be paralyzed by 3 Pneuma attacks like Freminet, Lyney, Neuvillette, and Hydro Traveler (but only during its ultimate attack).
- The said ‘ultimate attack’ is when it will channel Ousia energy to unleash a Gravity Reduction Field and you receive a warning that ‘the strength of the gravity here is decreasing, and the height of jumps is increasing.’ Characters within this field can jump significantly higher. During this moment, it will expose its Ousia core and you can paralyze it by attacking it with Pneuma attacks 3 times.
- But honestly, unless you bring 3 Pneuma characters. Most of its attacks are pretty easy to avoid so you should just focus on brute forcing this enemy until its HP reaches 0 while also avoiding any incoming attacks (unless you bring a shield).
Optimal Team Comps to use on Floor 12 in Genshin Impact 4.1 Update Spiral Abyss
Although you need to start from Chamber 1, at least you don’t have to worry about stars for the Chamber you already completed. This means that you can change teams and start over. In the First Half, Cryo or Pyro may be the best element because it’s the most effective in destroying the Xenomare Pearl on the new boss. Anemo CC isn’t needed because there are not many enemies in one wave unless you want to bring them to shred the enemies’ Elemental RES. Having a healer is also important because there will be 2 Wind Operatives here that can attach a Bond of Life to your character
In the Second Half, bring at least one Hydro character because there will be 3 Pyro Abyss Mages and you need said element to destroy their Pyro shield fast but try not to bring characters that can inflict Hydro on yourself so you won’t get Frozen in Coppelia’s stage. Anemo CC is beneficial in Chamber 1 to gather all Rifthounds but not really useful in Chambers 2 and 3 because the boss can’t be grouped, so it’s up to you to bring them or not. Don’t forget a healer here so you can remove the Corrosion status. Having a Pneuma character (Freminet, Lyney, Neuvillette, and Hydro Traveler) is also great since there are 2 bosses with Ousia type here.
F2P Friendly
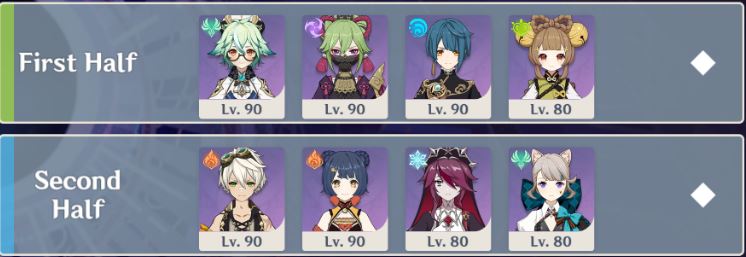
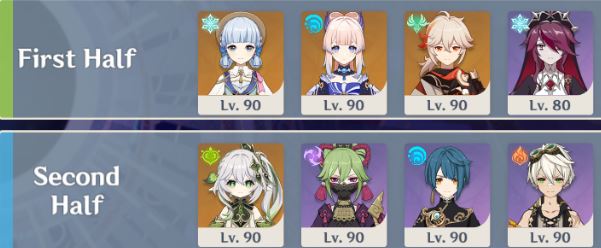
- First Half: Sucrose, Xingqiu, Shinobu, Yaoyao
- Second Half: Bennett, Xiangling, Rosaria, Lynette
Expert Game-through
- First Half: Ayaka, Kokomi, Kazuha, Rosaria
- Second Half: Nahida, Shinobu, Xingqiu, Bennett
That’s how you can clear the Spiral Abyss Floor 12 in the Genshin Impact 4.1 update!
What are your thoughts on the guide to clear Genshin Impact 4.1 Spiral Abyss Floor 12 Update? Let us know in the comments below.
For more Mobile Gaming news and updates, join our WhatsApp group, Telegram Group, or Discord server. Also, follow us on Google News, Instagram, and Twitter for quick updates.
The post Genshin Impact 4.1 Spiral Abyss: How to Clear Floor 12 appeared first on GamingonPhone.
from GamingonPhone https://ift.tt/hnE0bLC


No comments:
Post a Comment